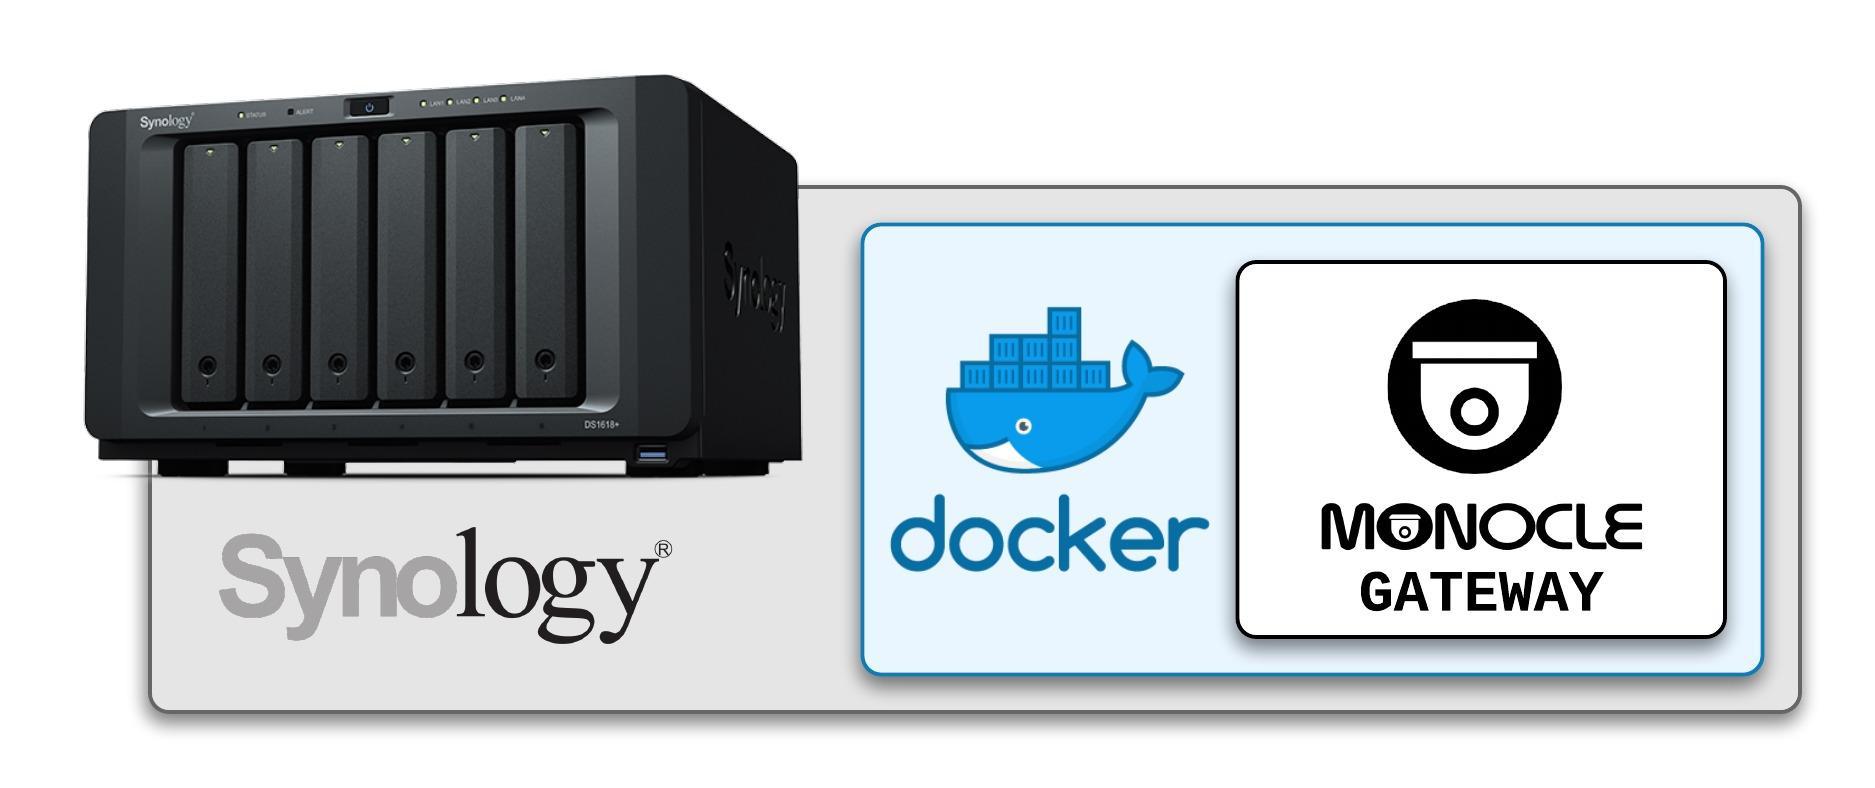
Install Monocle Gateway on Synology NAS
Installing Monocle Gateway on Synology NAS (via Docker)
Monocle Gateway can be installed on a Synlogy NAS using Docker if the Synlogy NAS hardware/model supports Docker containers. Please see this link for more details on supported Synology hardware:
ADVANCED / EXPERT TOPIC
Please note that installing Monocle Gateway using Docker on a Synology NAS is considered an advanced and complex topic and may only be suited for advanced users with Docker and advanced networking experience. Users that attempt this task should be proficient with networking, routing, docker, SSH and general Synology NAS administration.
Installing Monocle Gateway as a docker container on the Synology NAS is a more complicated setup than a typical Docker host. The primary challenge is the fact that Monocle Gateway must listen on port 443 (dictated by Amazon) and the Synology NAS already reserves and uses port 443 for itself with no means to choose/configure an alternate port. So this port conflict/contention means that we have to configure some advanced networking options for the Docker container that is not supported by the Synolog Docker GUI app. This means that we will have to perform the configurtation via text files and launch the Docker container from the terminal shell/SSH. Ultimately we will assign a secondary static IP address to the network interface used by the NAS to attach to the local/private network and allow the Monocle Gateway docker container to listen on this new static IP address instead of the NAS's existing host network address where port 443 is already in use. This configuration takes advantage of the macvlan networking options for a docker container.
LIMITED SUPPORT
We do our best to provide the necessary steps to get started but are unable to provide direct technical support for this type of installation.
Contents
Install Prerequsites
-
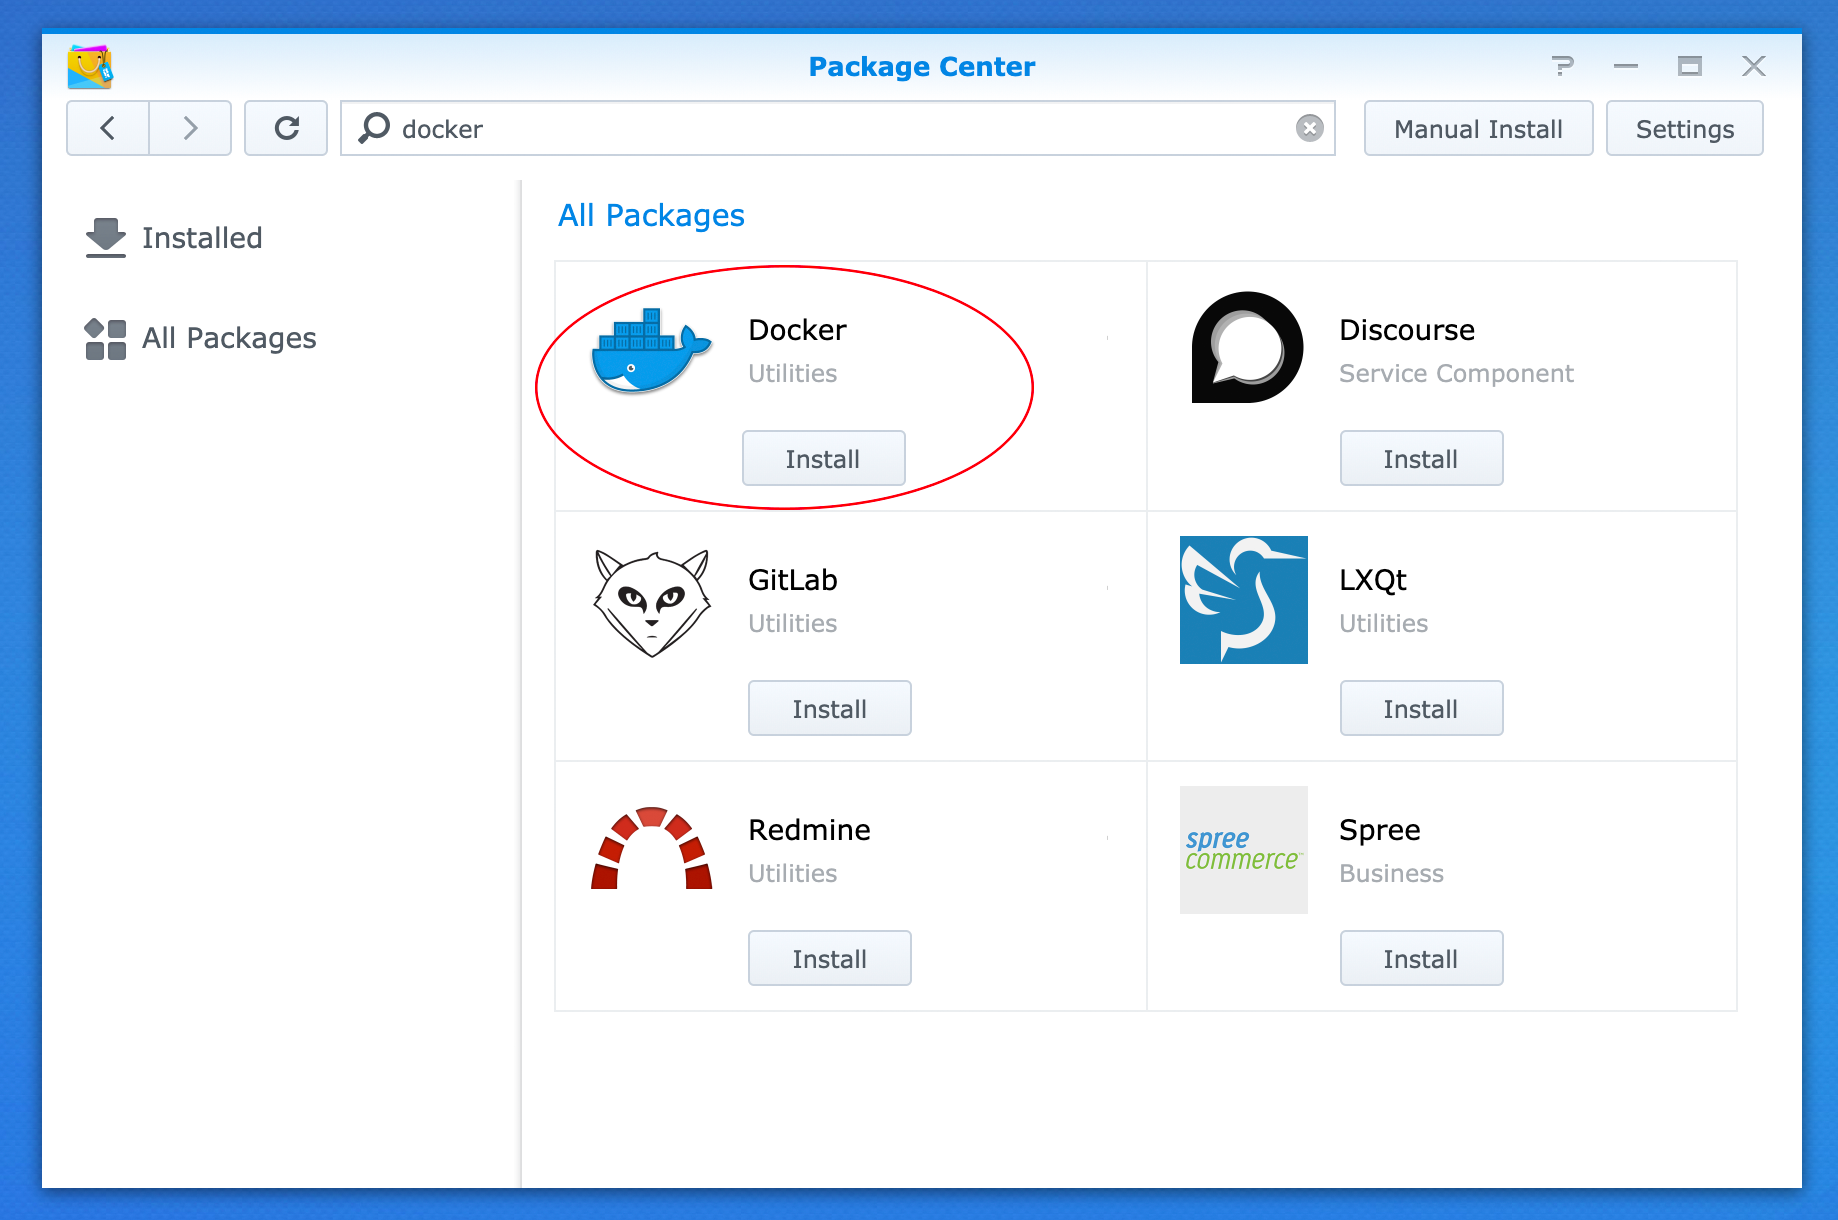
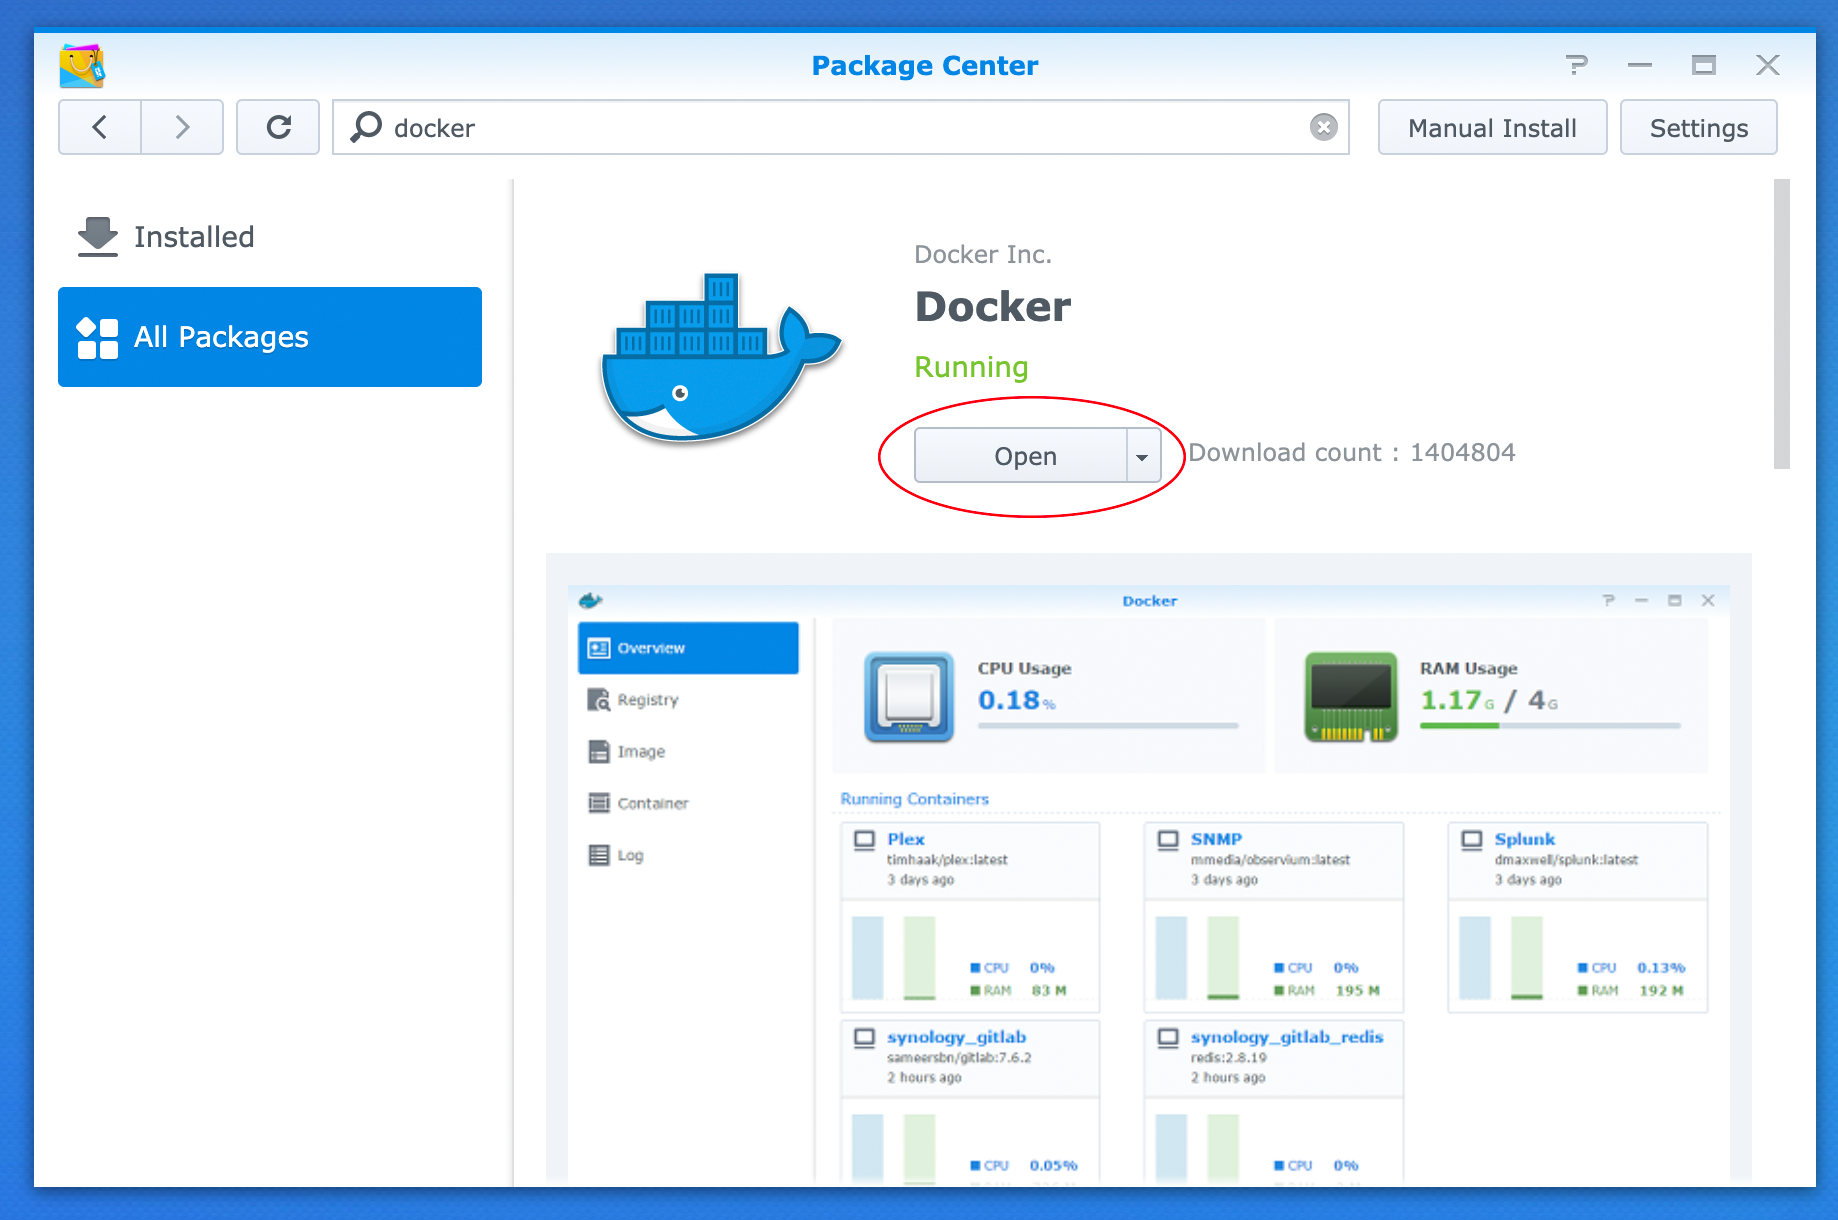
If Docker is not already installed on your Synology NAS, then please install the Docker application on your Synology NAS using the Synology Package Center.
-
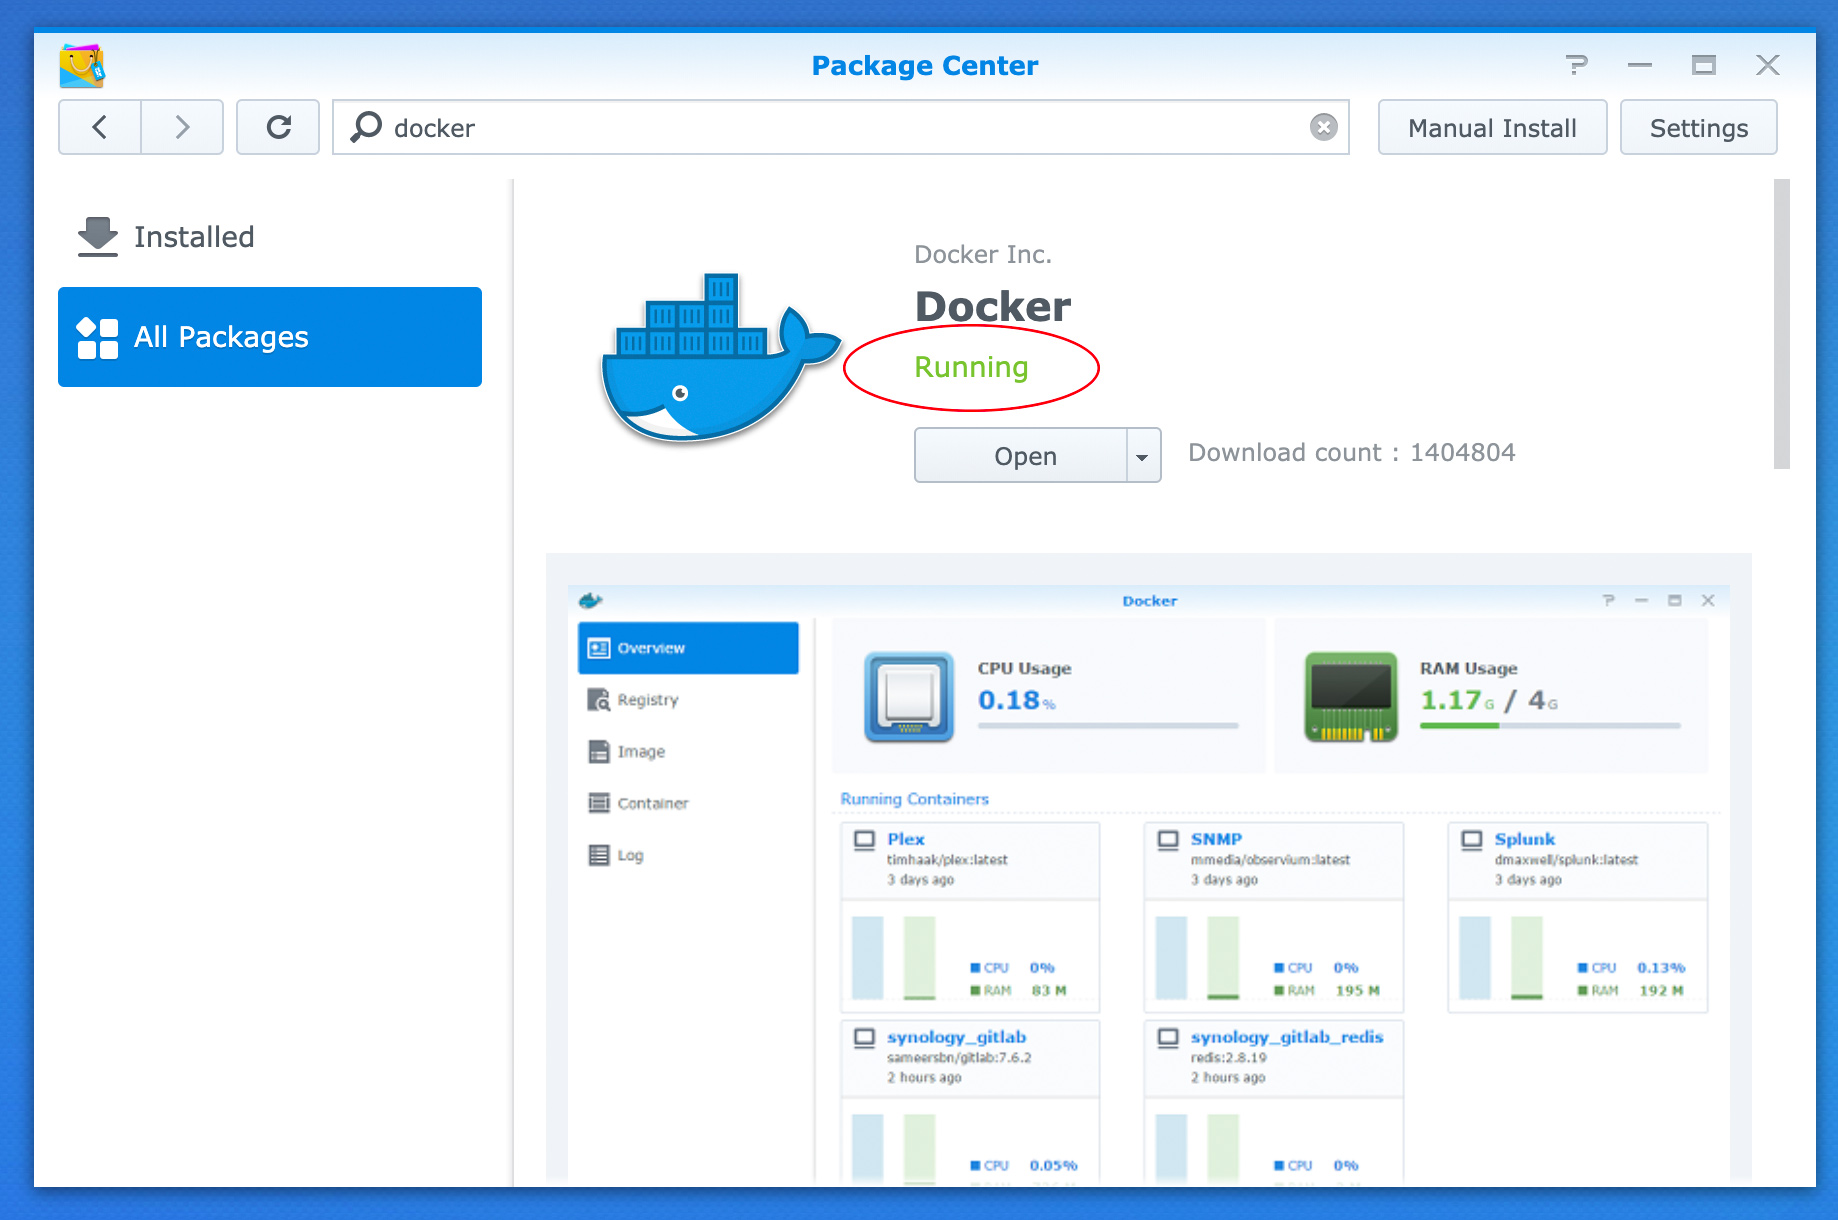
Once installed, make sure the Docker service is in the RUNNING state.
-
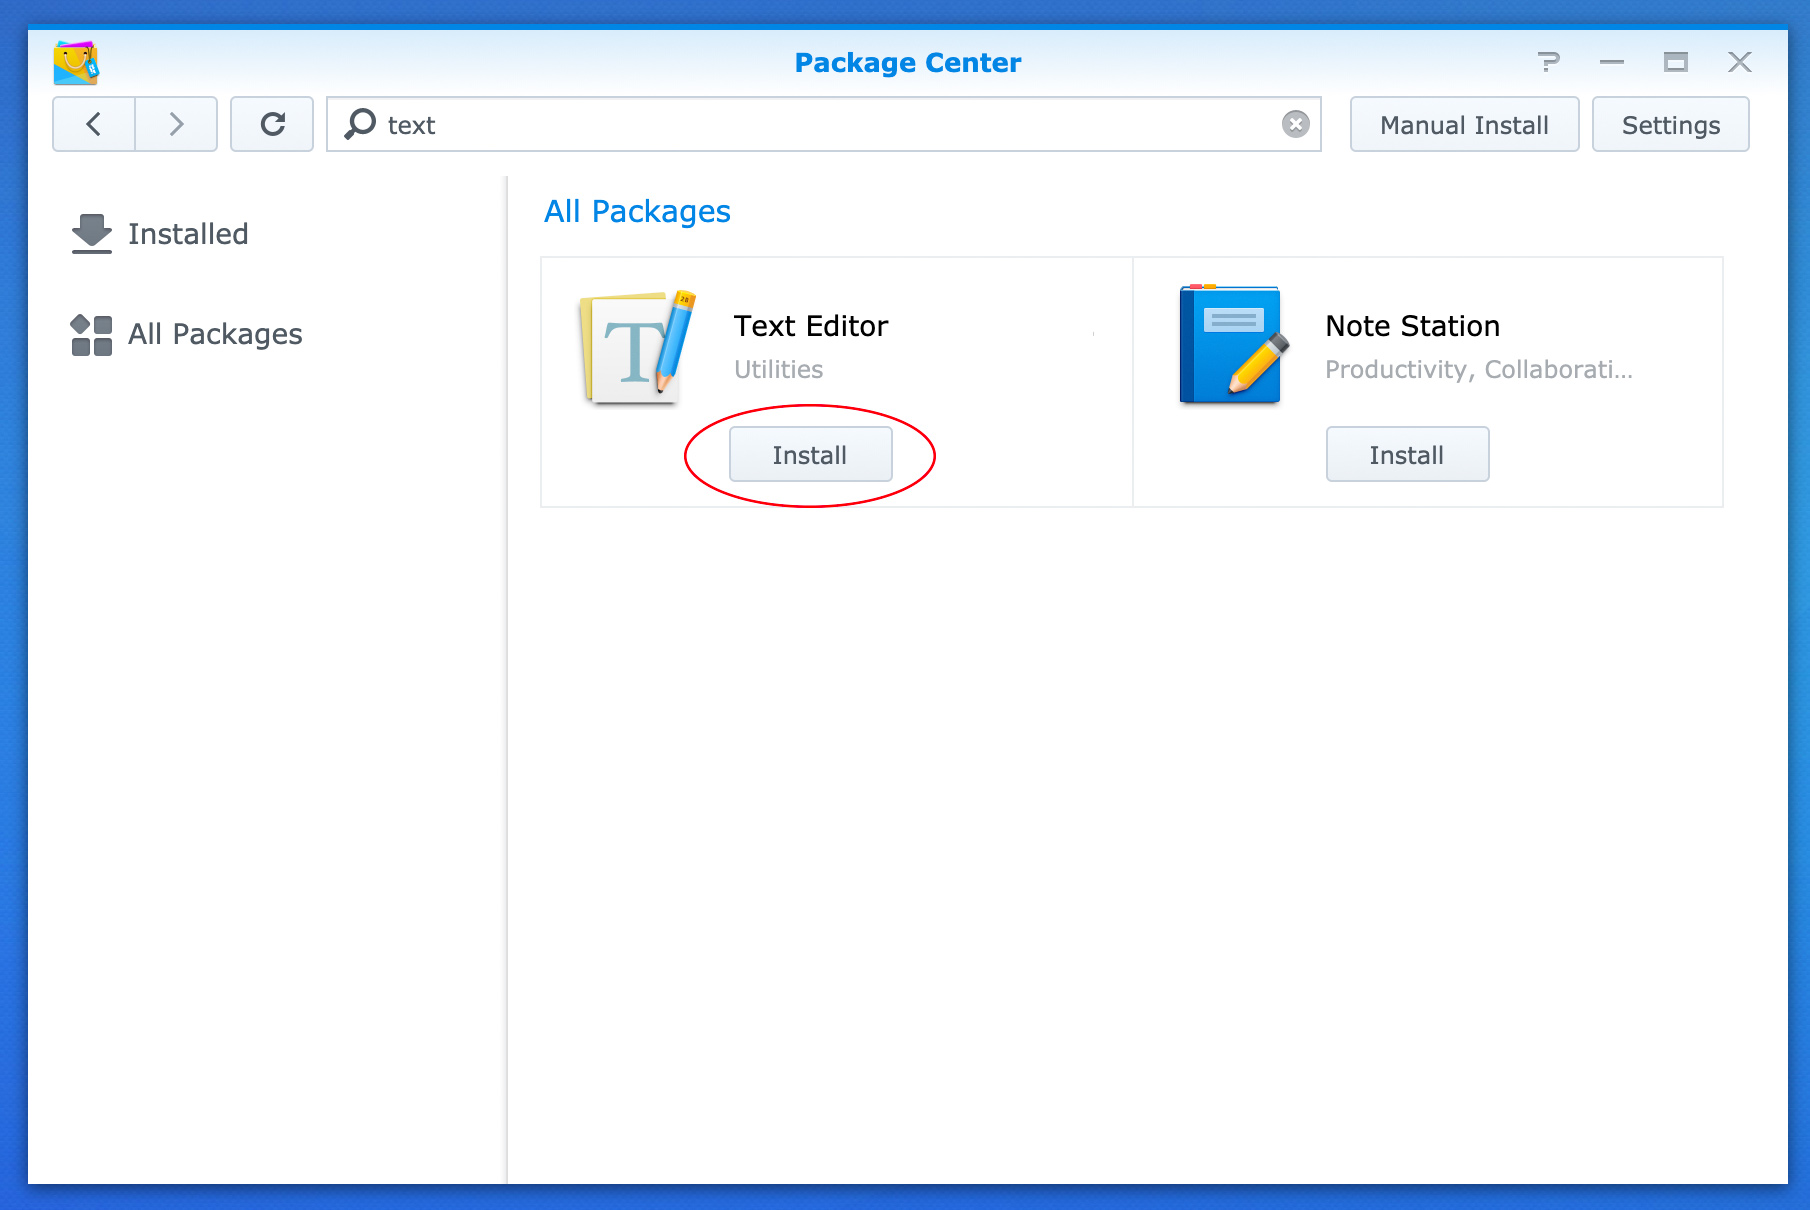
Additionally, please install the Text Editor application on your Synology NAS using the Synology Package Center.
Configure System / Environment
-
Open the Control Panel app from the Synology main menu and navigate to the Terminal & SNMP tab. Enable SSH access to your NAS.
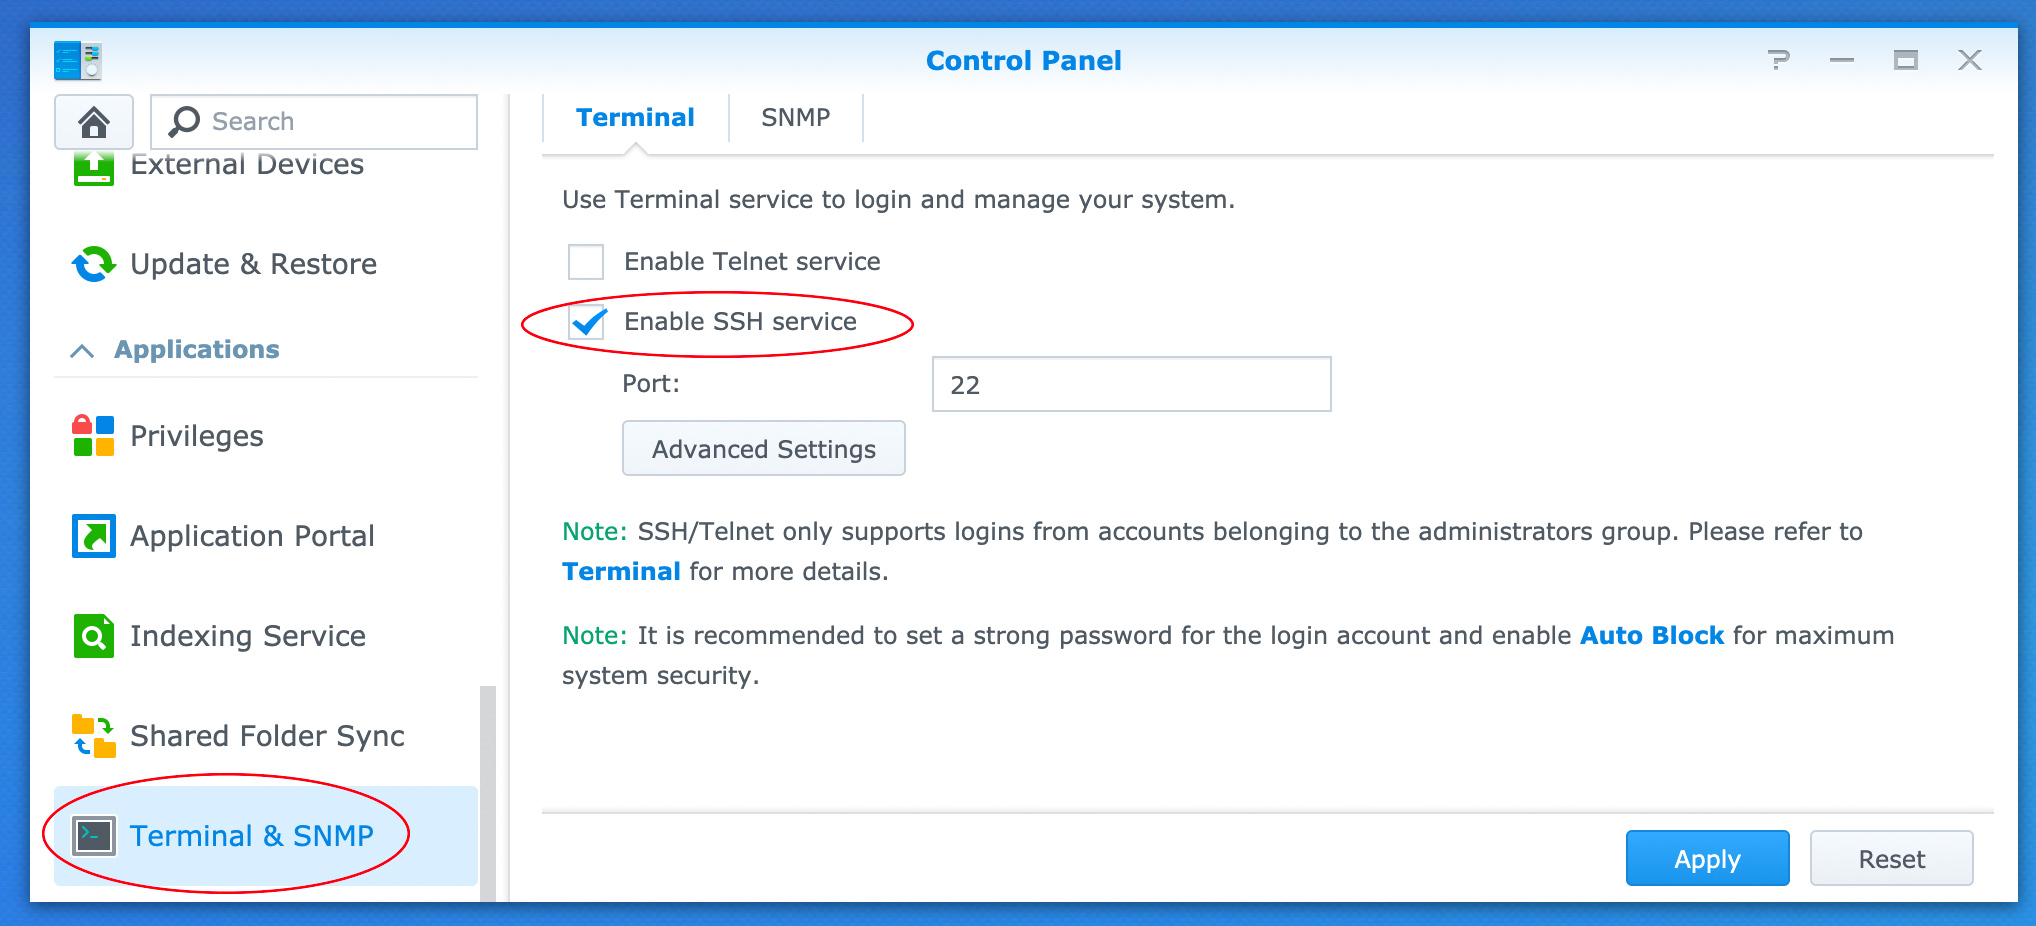
If you prefer to limit access to your NAS, you can DISABLE SSH acccess after completing this installation.
-
Open the Control Panel app from the Synology main menu and navigate to the Shared Folders tab. Create a new
monocleshared folder.In this example we will create the monocle shared folder on
volume1.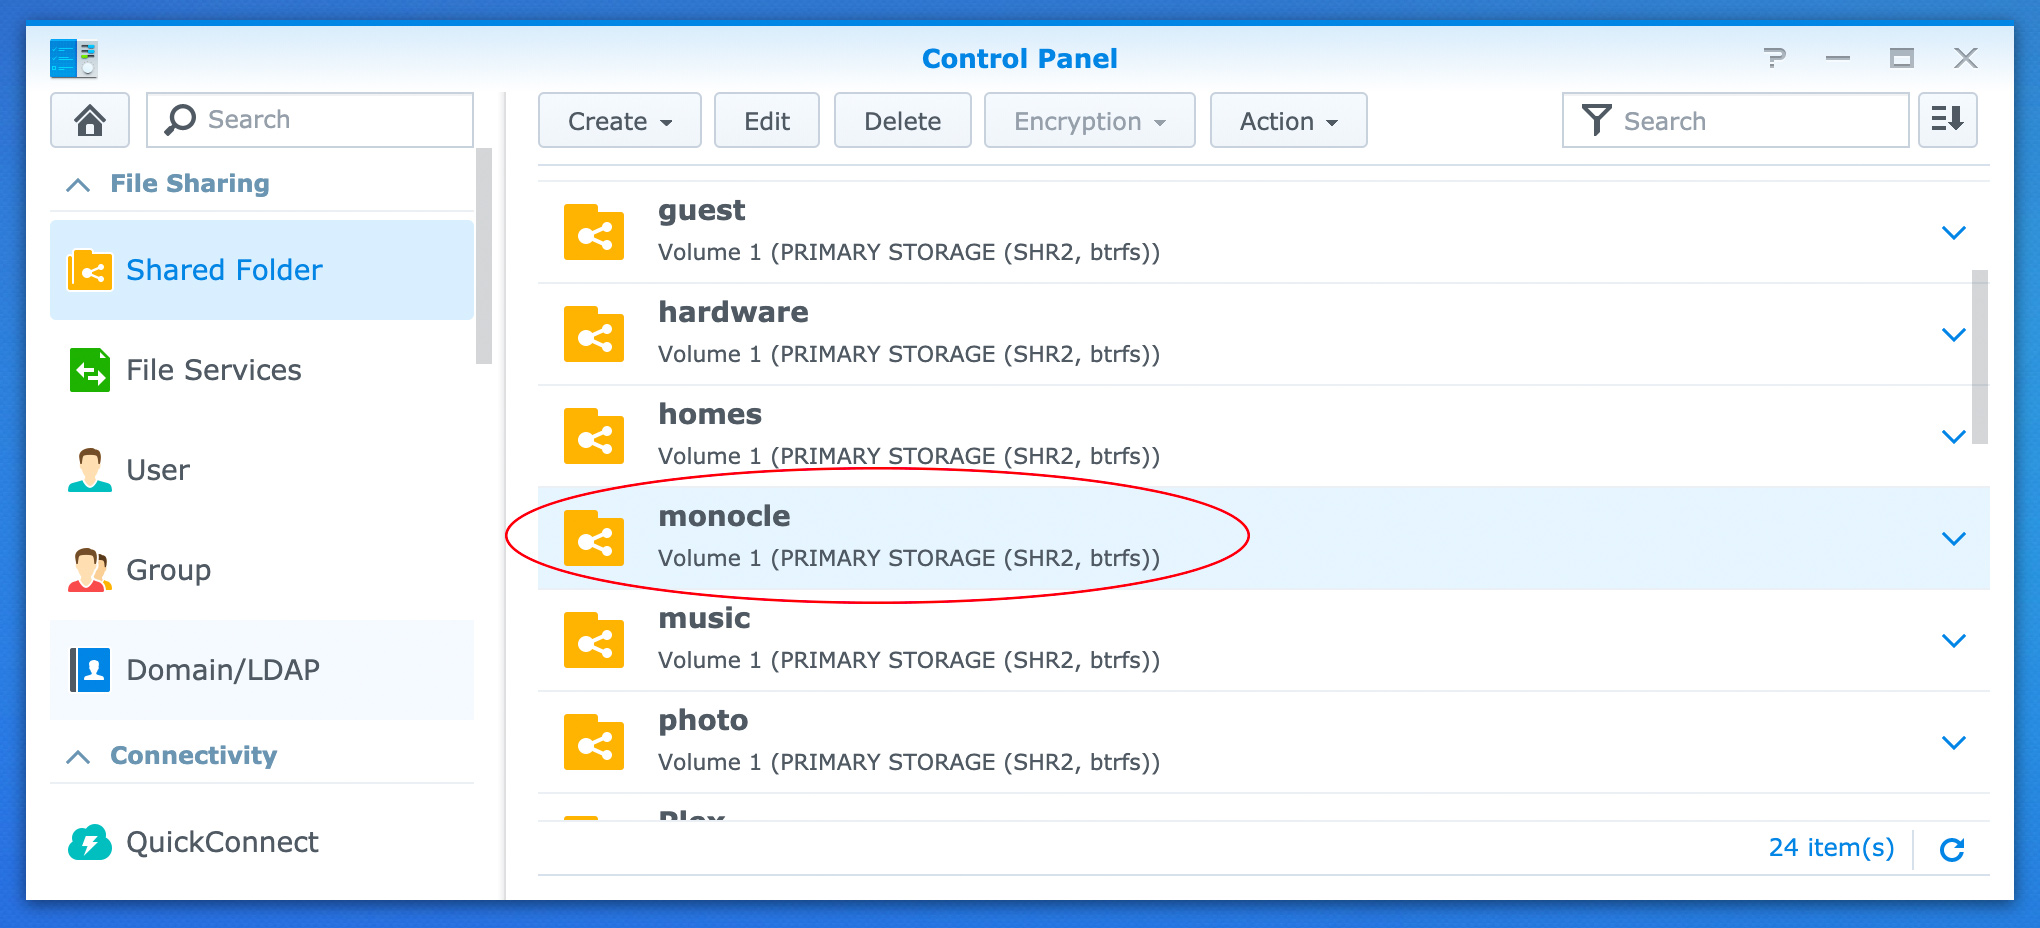
-
Open the Text Editor app on your Synology NAS from the main menu and create a new text file.
Save the empty text file asdocker-compose.ymlinside the newly created monocle shared folder.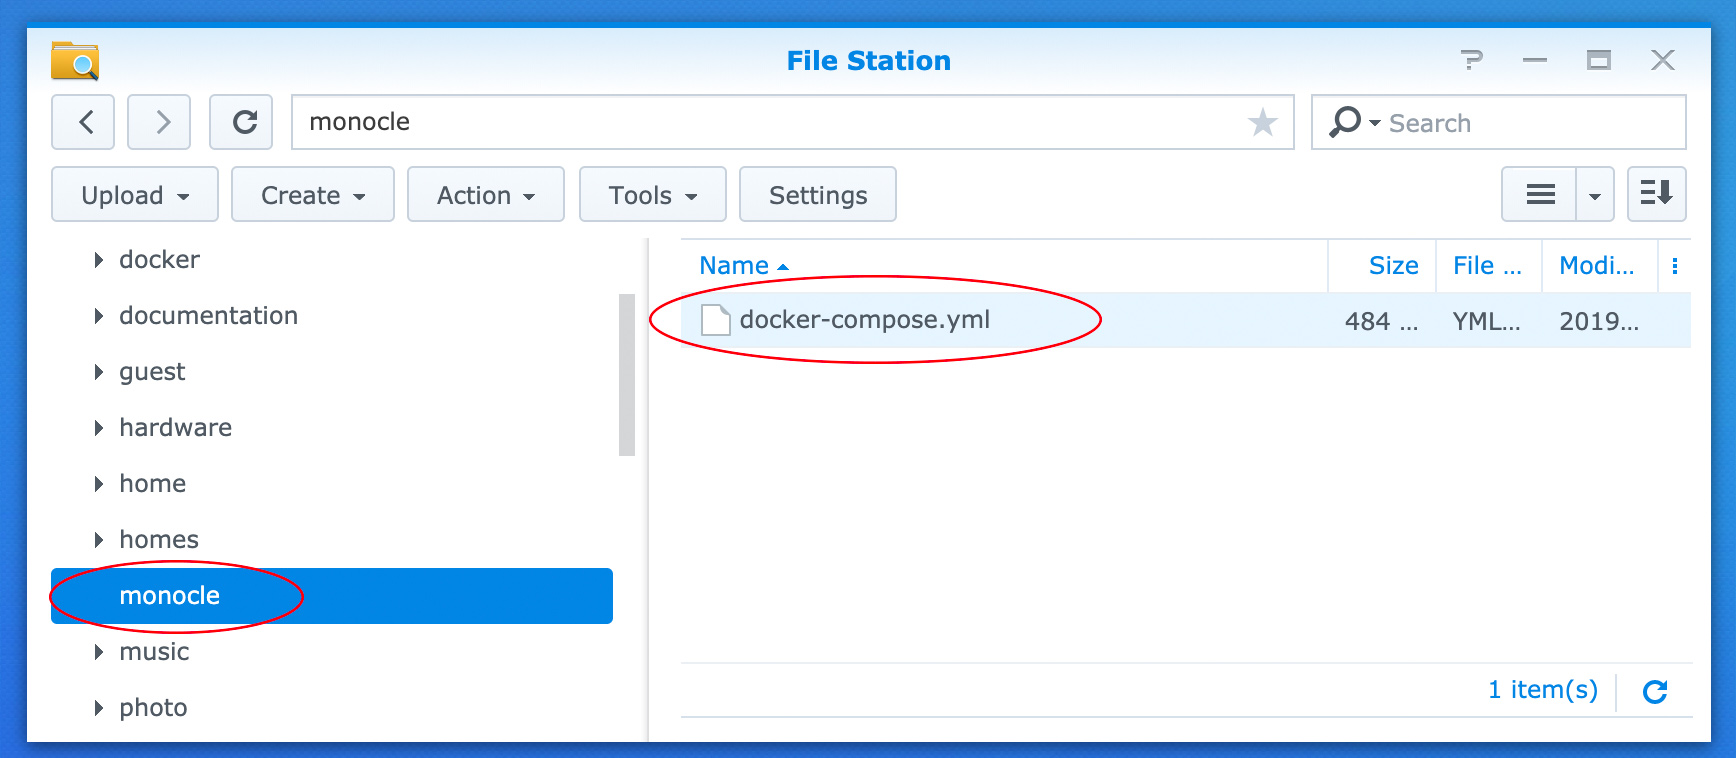
-
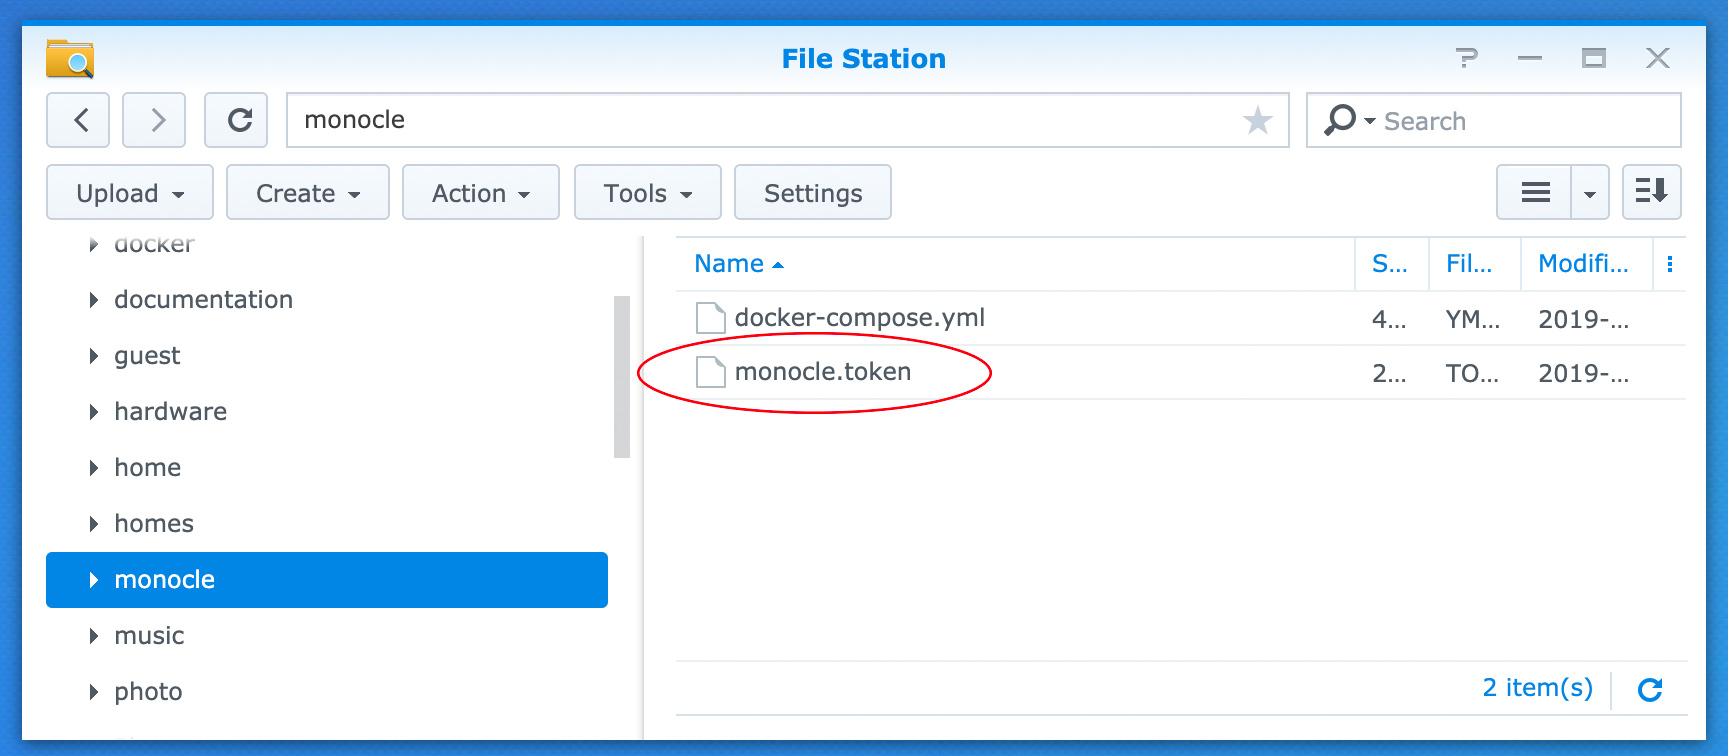
Next you will need to create a
monocle.tokenfile from your Monocle web portal account and then copy that file to the monocle shared folder on your Synology NAS.See this topic for more details on how to generate your API token: Monocle API Token
Configure docker-compose.yml
-
Open the
docker-compose.ymlfile from the monocle shared folder using the Text Editor app on your Synology NAS. -
Copy the contents below into this text file:
version: '2'

services:
  monocle-gateway:
    container_name: monocle-gateway
    hostname: monocle-gateway
    image: monoclecam/monocle-gateway
    restart: always
    volumes:
      - /volume1/monocle:/etc/monocle
    networks:
      monocle-gateway-network:
        ipv4_address: 10.1.1.199

networks:
  monocle-gateway-network:
    driver: macvlan
    driver_opts:
      parent: eth0
    ipam:
      config:
        - subnet: 10.1.0.0/16
gateway: 10.1.1.1-
There are a number of specific configuration elements you must edit for your specific environment; these are circled in the screenshot below.
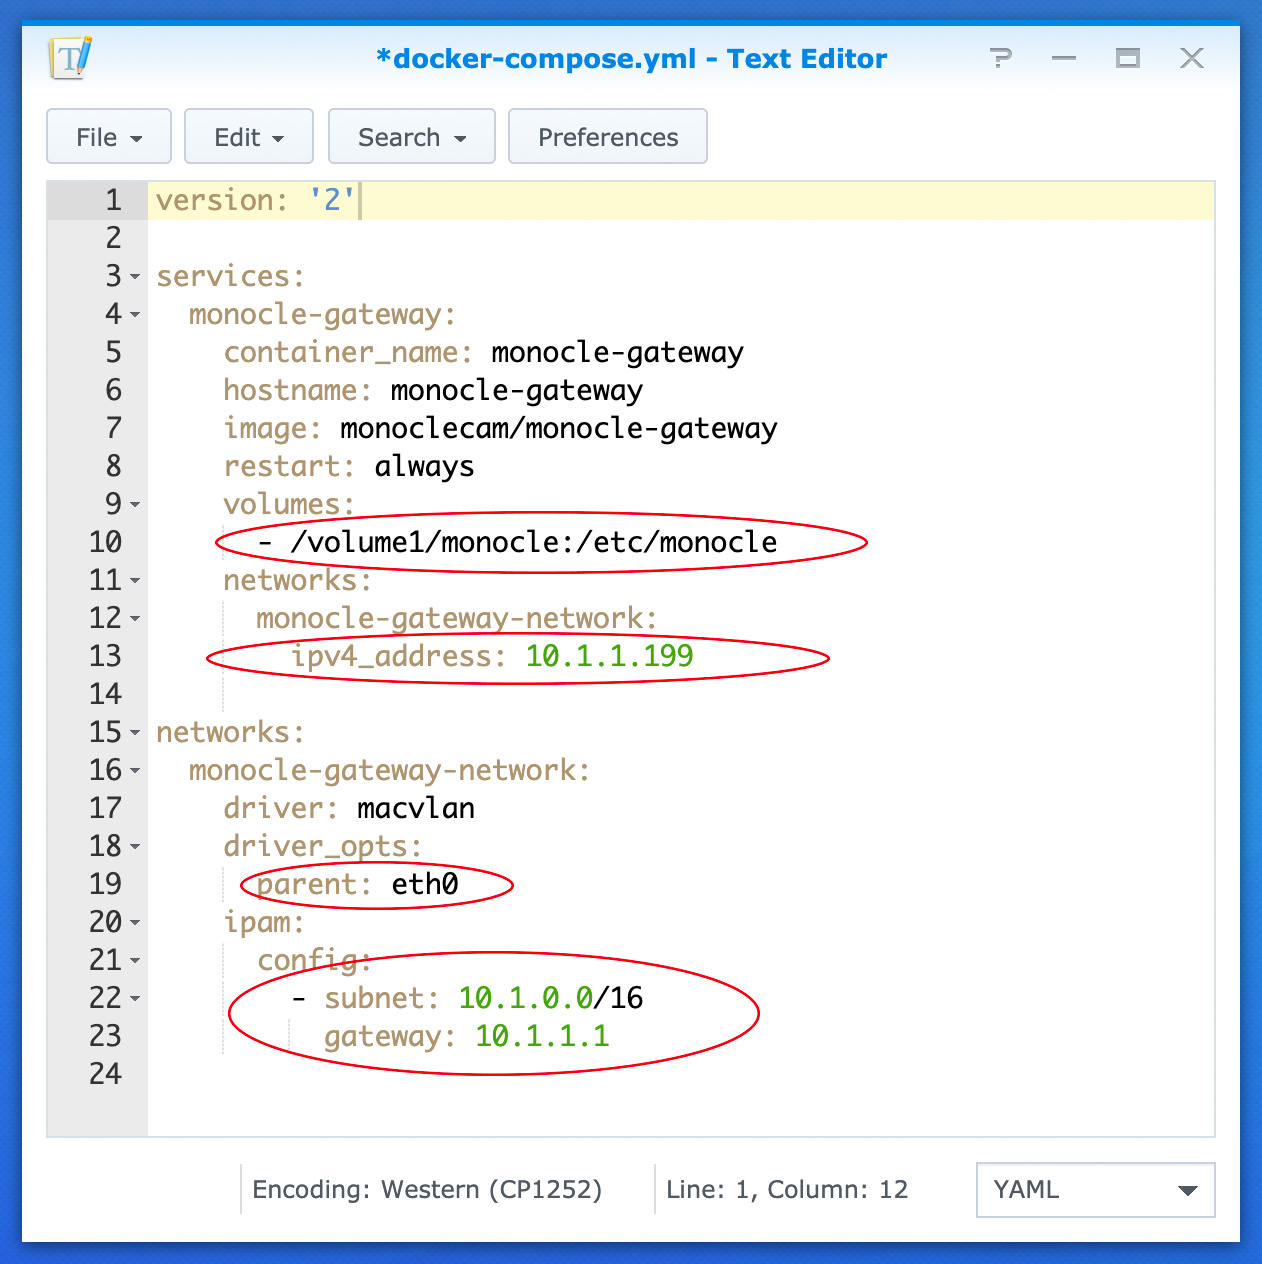
-
The first element we need to configure is the services/monocle-gateway/volumes element. This configuration item defines the shared folder path where the Monocle Gateway can expect to find any monocle configuration and/or token files needed at startup or during runtime. If your monocle shared folder is located on volume1, then the correct volume entry should be
/volume1/monocle:/etc/monocle. If your monocle shared folder is located on a different volume, you will need to update this configuration property accordingly. -
The next element we need to configure is the services/monocle-gateway/networks/monocle-gateway-network/ipv4_address element. This configuration item defines the concrete/static IP address that will be assigned to the Monocle Gateway container instance when it is started. In this example, we have the address 10.1.1.199 listed because this NAS is running inside a 10.1.0.0/16 network. Most home networks likely use a network address rage of something like 192.168.1.0/24, if that is the case, some static IP address like 192.168.1.199 may be appropriate. The address you assign must be a valid address within your private/local network's subnet and not be within the IP address range that your DHCP server can dynamically provide to other hosts on the network.
This IP address must be a valid IP address within the range of private/local addresses on your nework and must not be assigned/assignable to any other node on the network.
-
The next element to configure is the networks/monocle-gateway-network/driver_opts/parent element. This configuration item defines the name of the physical/logical network interface that the Monocle Gateway container will attach to for network access. This network interface must be attached to your local network. Below is a listing of the most common network interfaces for a Synology NAS:
Physical Interface Friendly Name eth0 LAN1 eth1 LAN2 ovs_bond0 Bond 1 (Link Aggregation) The network interface must be the physical ethernet interface attached to your local network from the Synology NAS or the bonded logical interface if using link aggregation. You can connect to the NAS using SSH and run the
ifconfigcommand to list all the supported interfaces to further inspect or determine which interface is being used. -
The next element to configure is the networks/monocle-gateway-network/ipam/config/subnet element. This configuration item defines the actual IP address range and subnet of your local/private network. In this example, we have the IP address and subnet range of a 10.1.0.0/16 (255.255.0.0) network. However, most home networks likely use something more like 192.168.1.0/24 (255.255.255.0), The address range you assign must match your local/private network and must be defined in the CIDR notation format.
The IP range and subnet must be defined using CIDR notation. Please see this CIDR calculator if you need help with the proper notation for your private/local network address range.
-
The final element to configure is the networks/monocle-gateway-network/ipam/config/gateway element. This configuration item defines the actual network gateway (router) address for your local/private network. In this example, we have the IP address of 10.1.1.1 which is the default router on this example network. However, most home networks likely use something more like 192.168.1.254 or similar address. This IP address must be the IP address of your default router/gateway for your private/local network.
Create & Launch the Monocle Gateway Container
-
Connect to a SSH terminal/shell session from your workstation to the Synology NAS using the "admin" account. The example below uses 10.1.1.3 as the IP address for the Synology NAS. You will need to use your Synology NAS IP address instead.
ssh [email protected] -
Once connected to a SSH shell session on the NAS, navigate to the monocle shared directory (on the volume where you created the monocle shared directory).
cd /volume1/monocle/Both the docker-compose.yml file and the monocle.token file should be located in this directory. You can use the ls command to list the directory contents and verify the docker-compose.yml file and monocle.token file are found.
-
Now we will create and launch the Monocle Gateway docker container instance from the command line using the following command:
sudo docker-compose up --detachThis single command will use the docker-compose.yml file to download the Monocle Gateway docker image from the Docker Hub repository, create the custom docker macvlan network and then lauch the custom configured Monocle Gateway docker container instance. Below is an example of the output you might expect when running these commands:
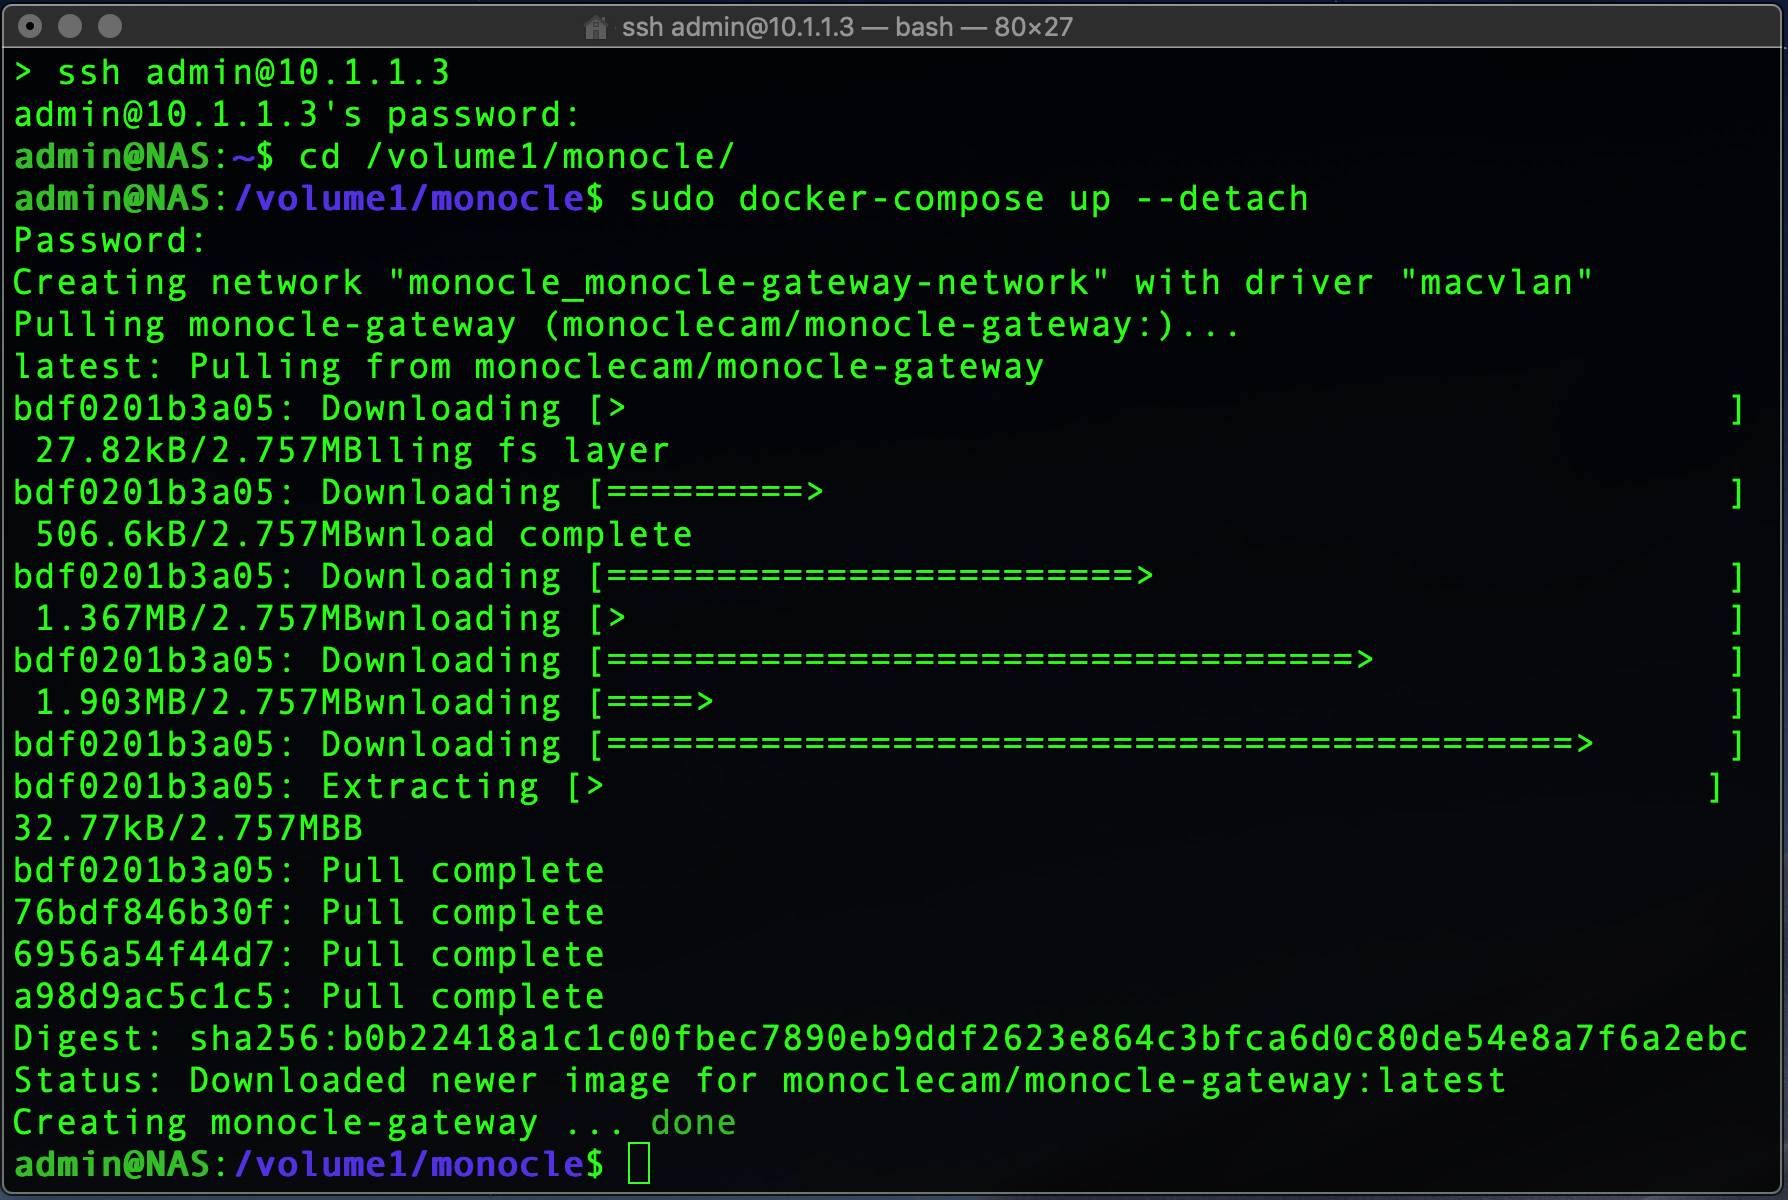
If the docker compose process completed successfully, then the Monocle Gateway container was created and you are ready to verify the container and check its startup log.
Verify / Validate Monocle Gateway Container
-
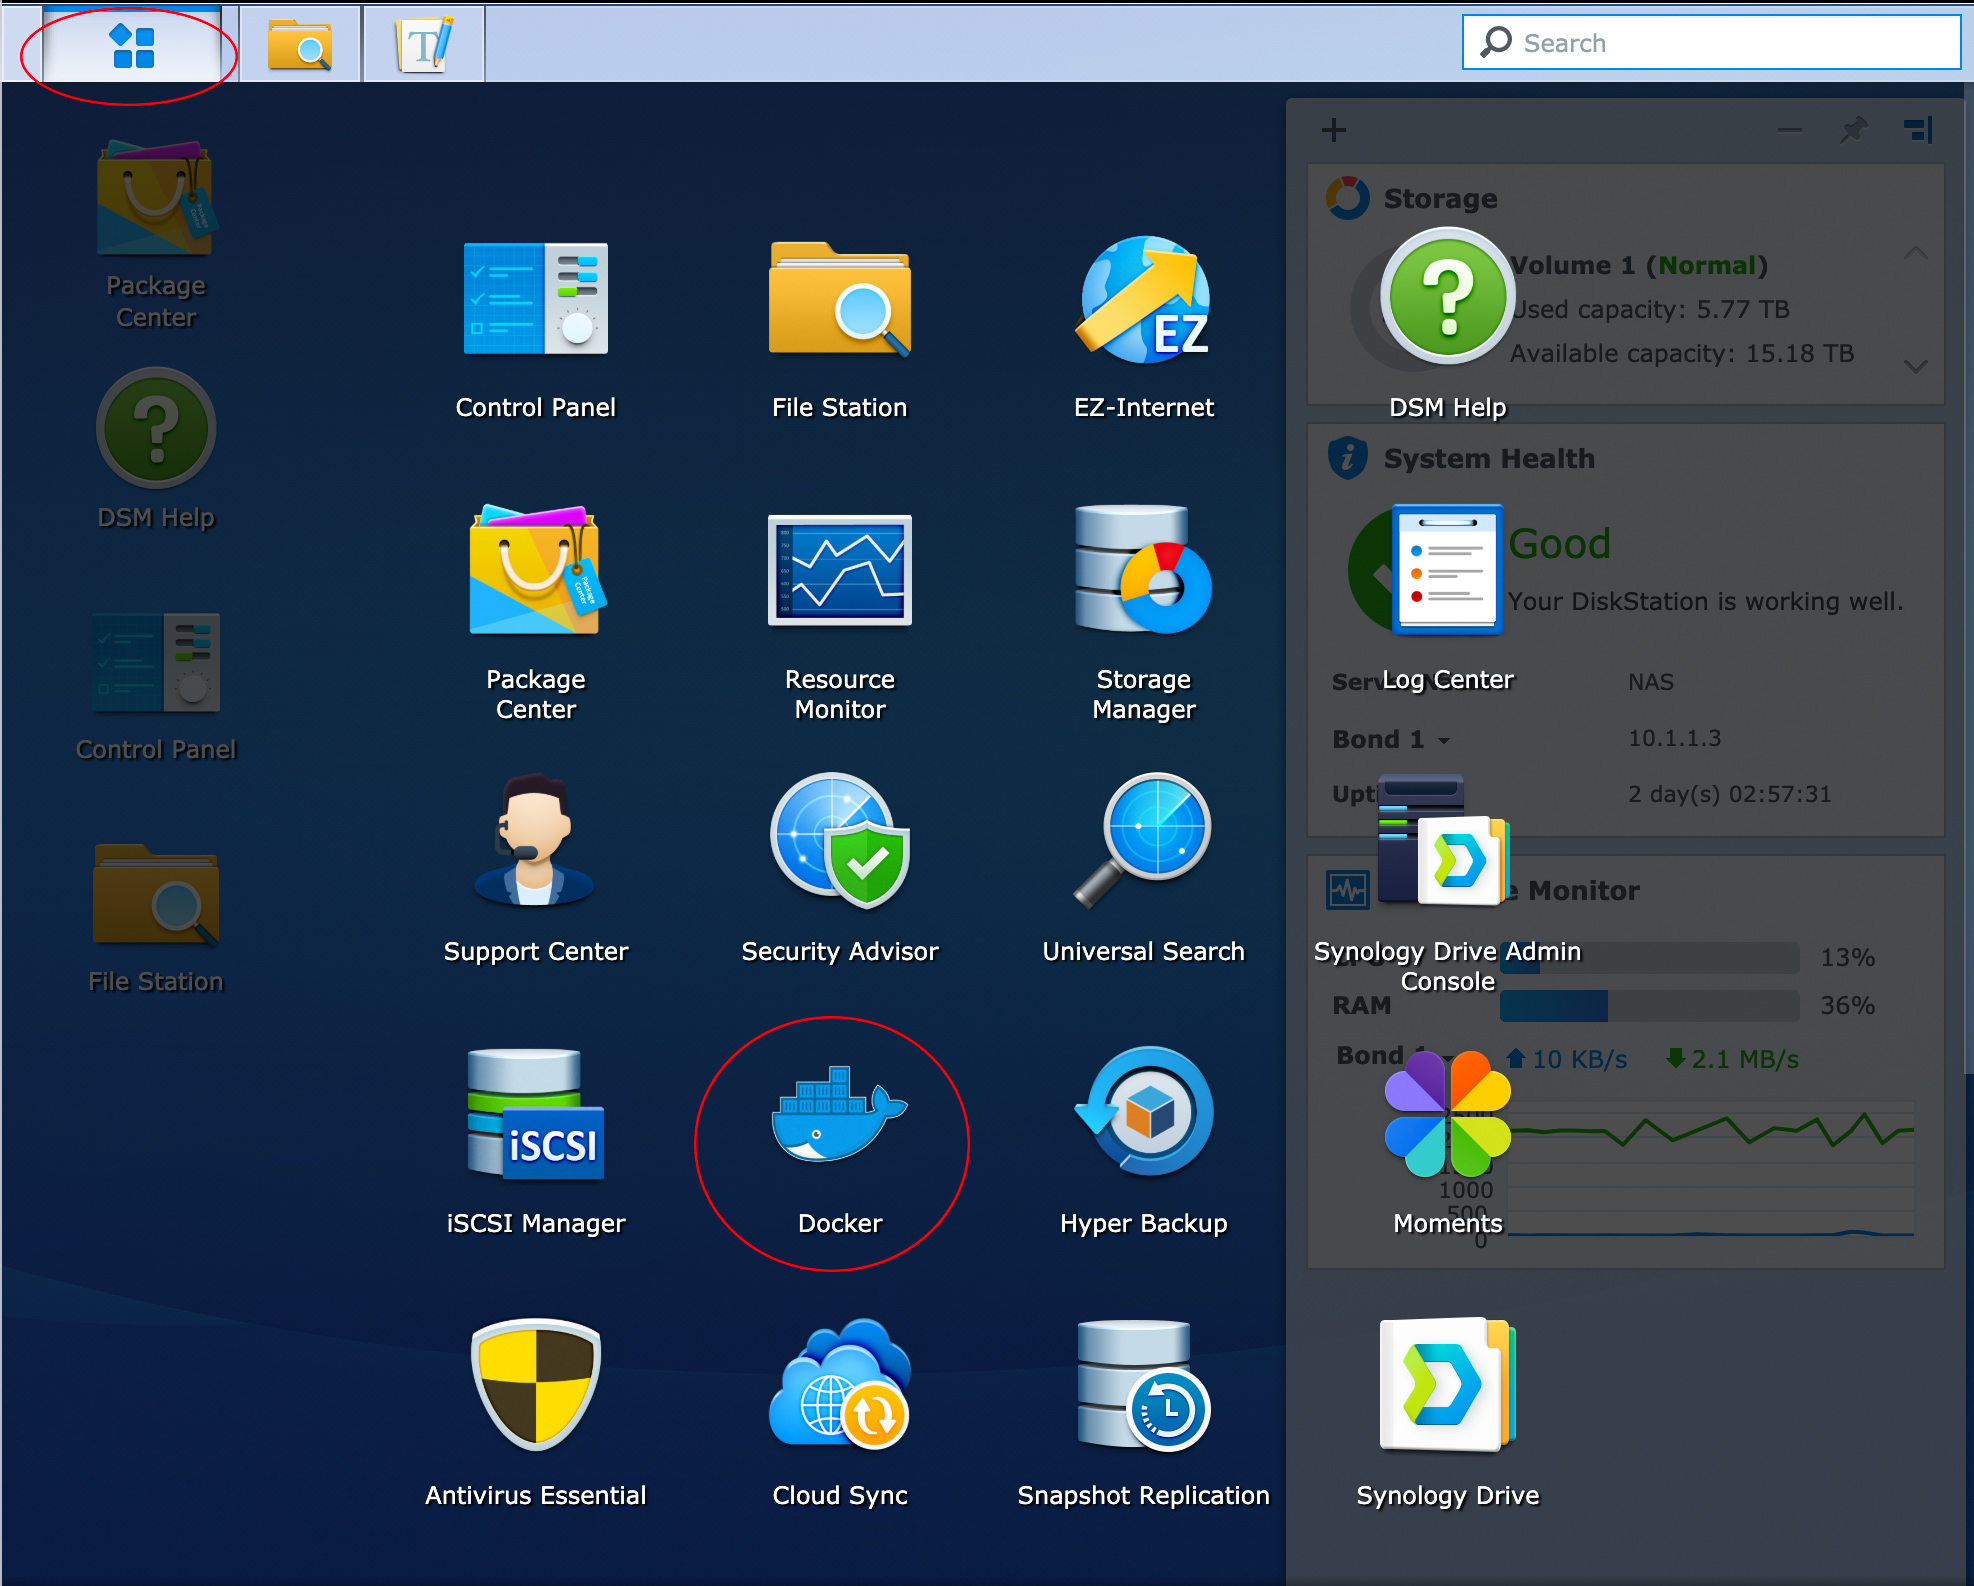
Open the Docker (management) app via your Synology NAS.
 You can also open the Docker (management) app via the Launch menu.
-
In the Docker (management) app, select the Network tab and verify that a custom macvlan network was created for your Monocle Gateway service.

-
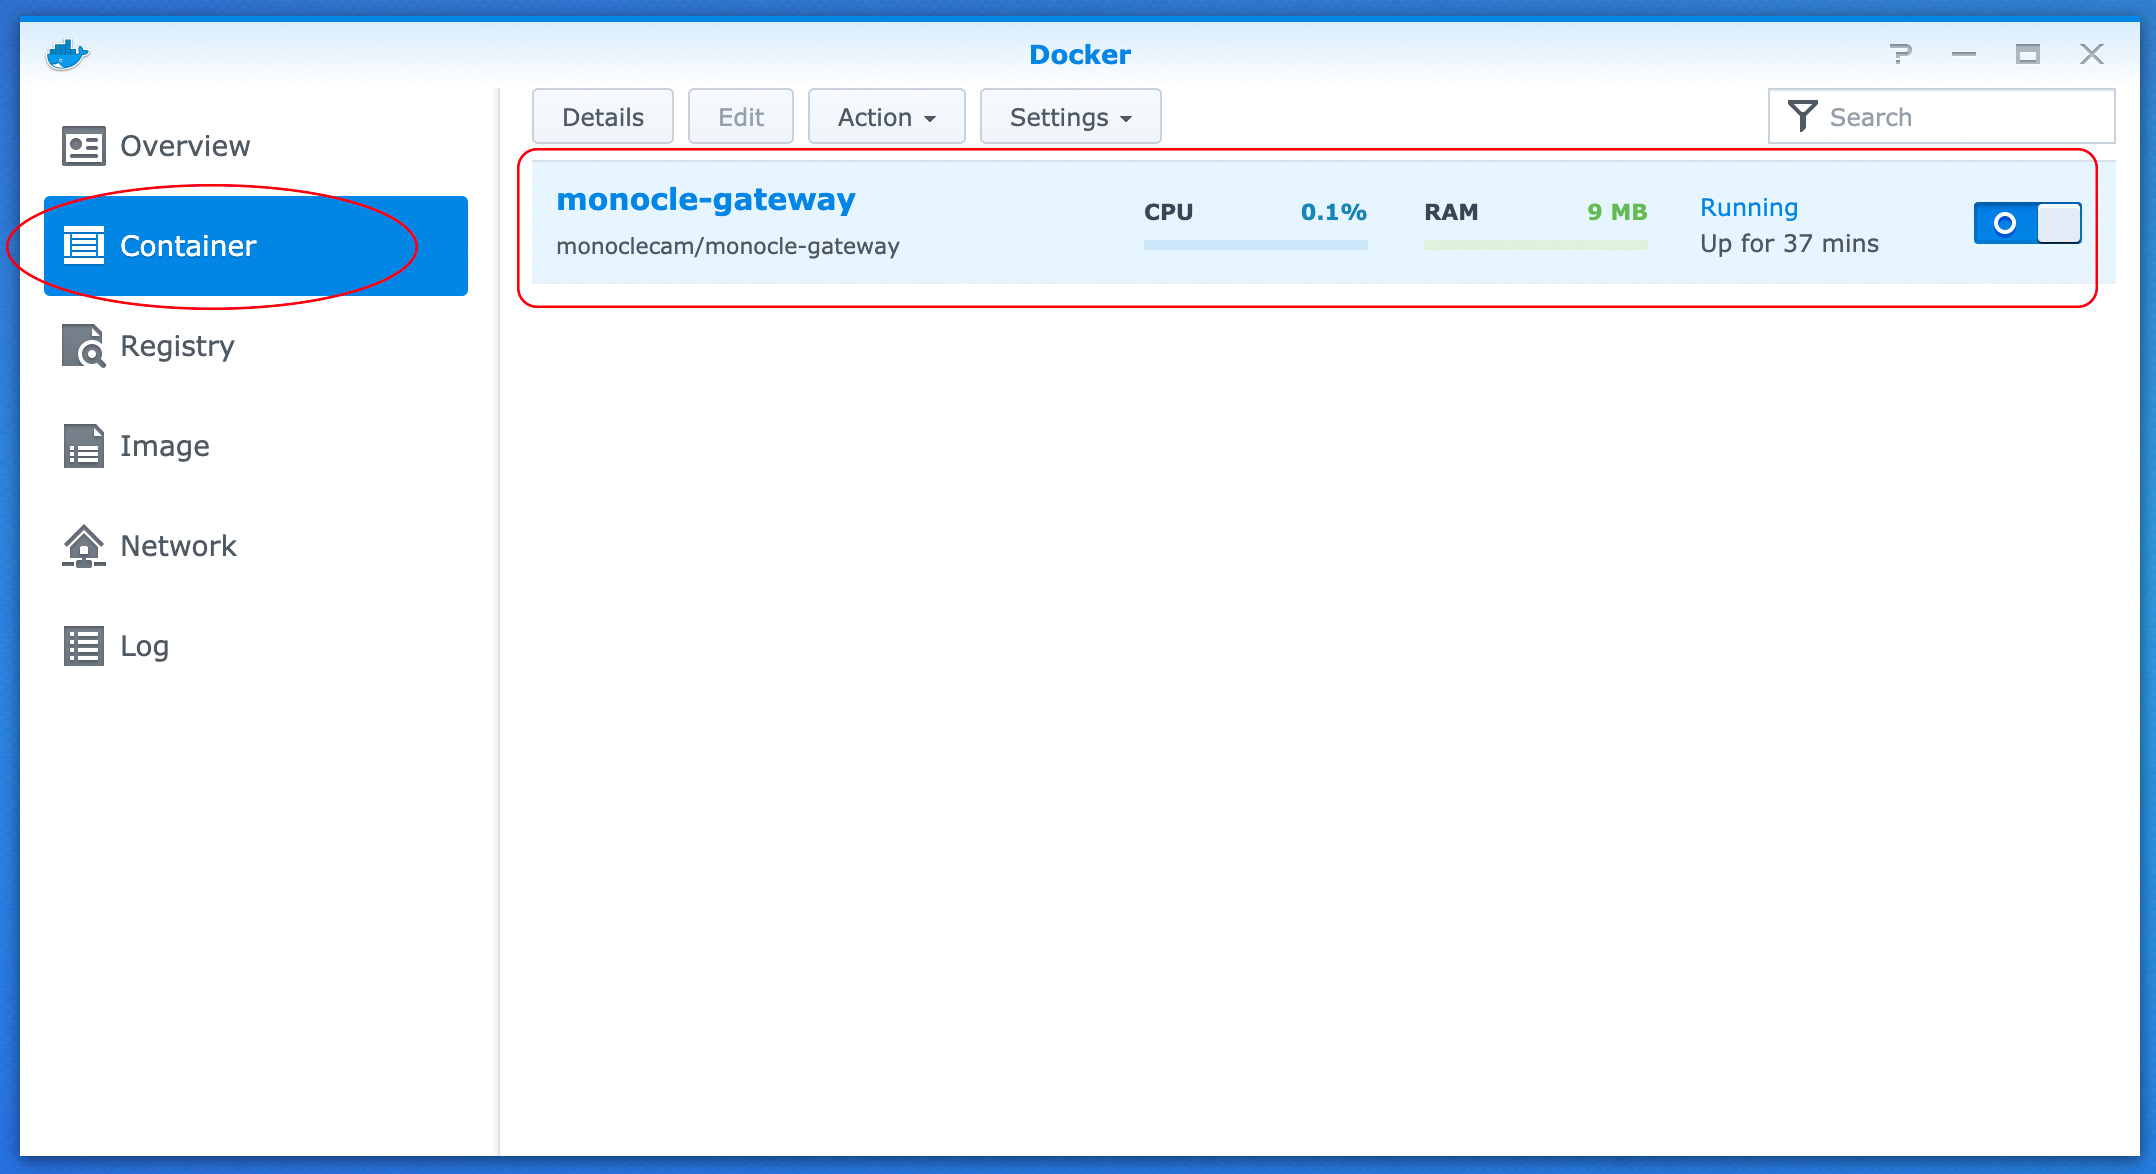
In the Docker (management) app, select the Container tab and verify that a custom monocle-gateway container was created and is actively running.
-
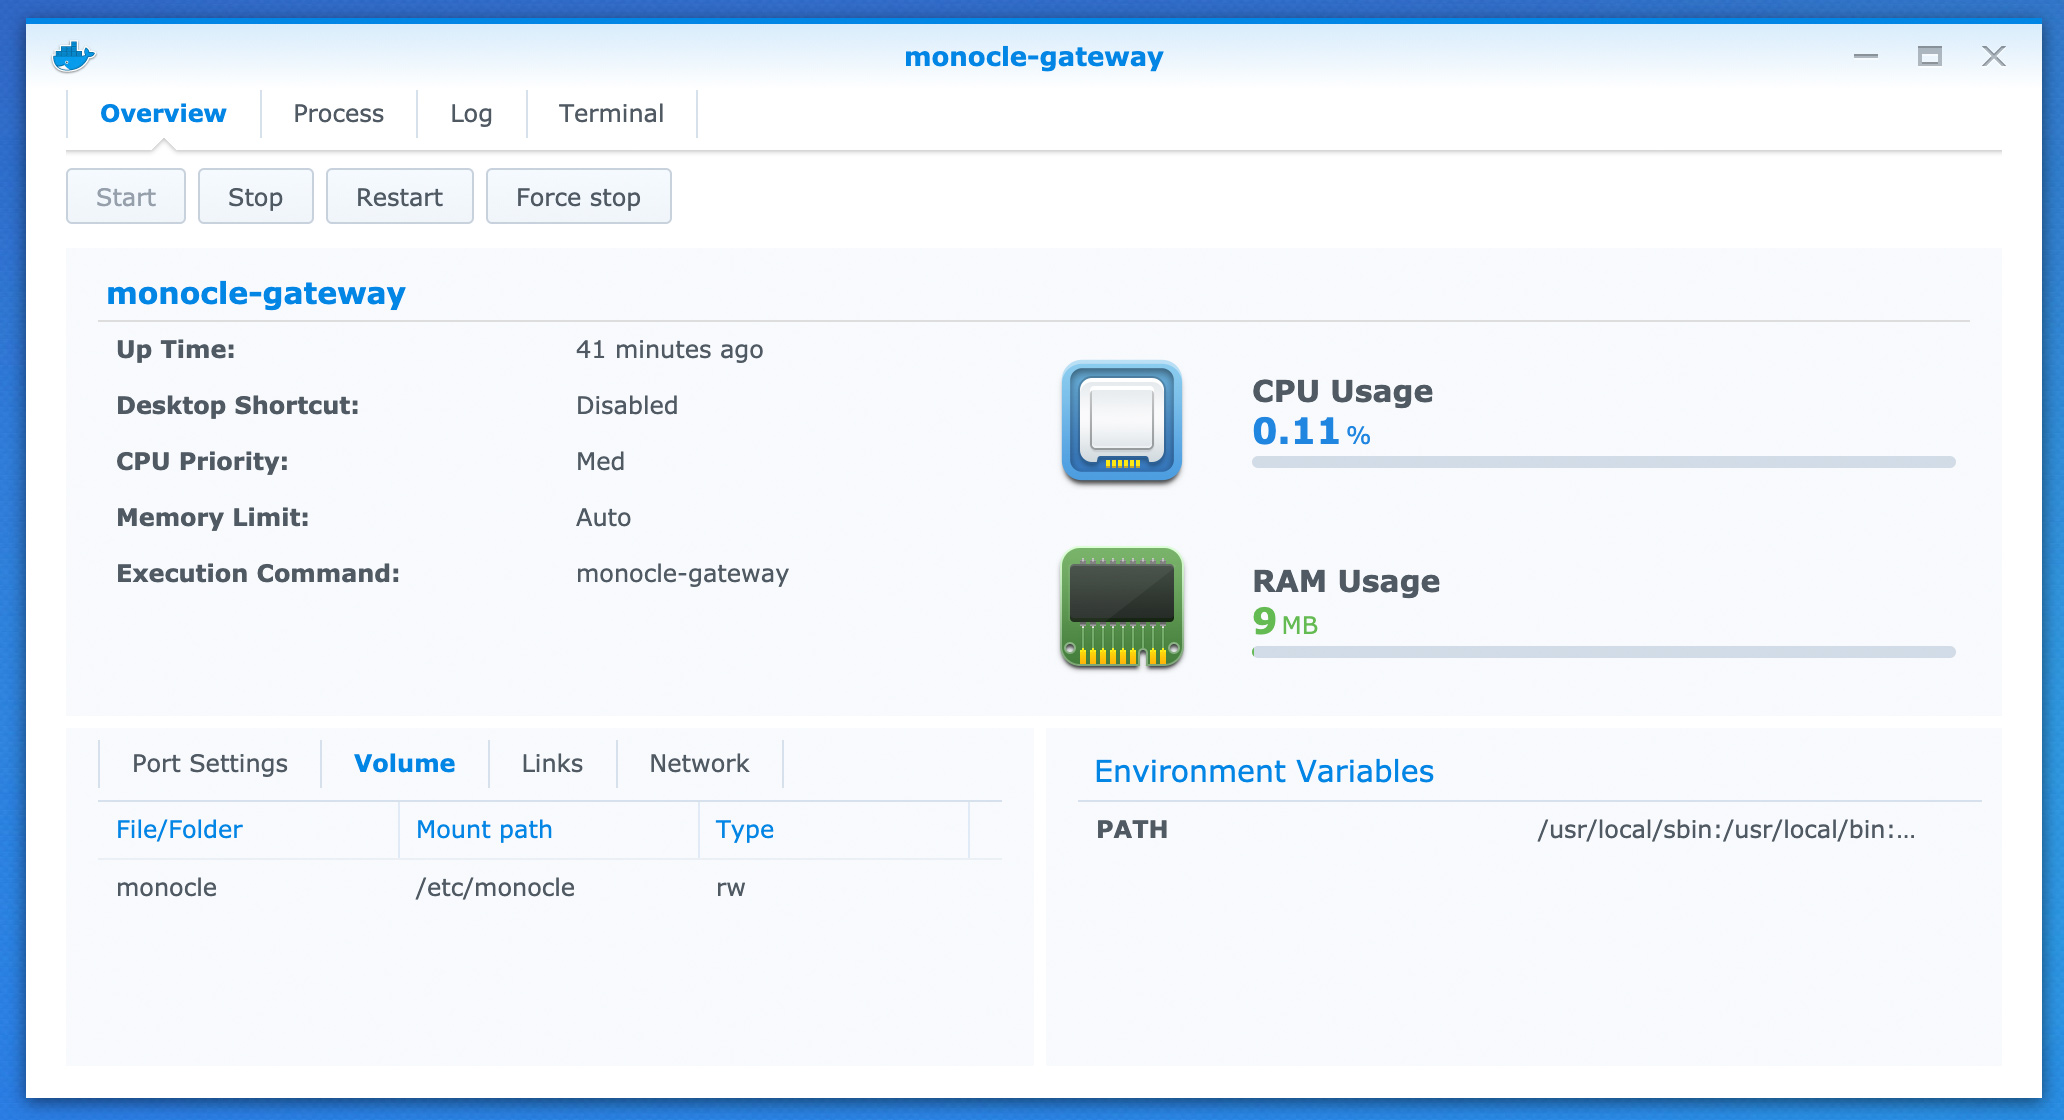
In the Docker (management) app, select the Container tab, select the monocle-gateway container, then select the DETAILS menu option. This details view provides options to start, stop and restart the container instance.
-
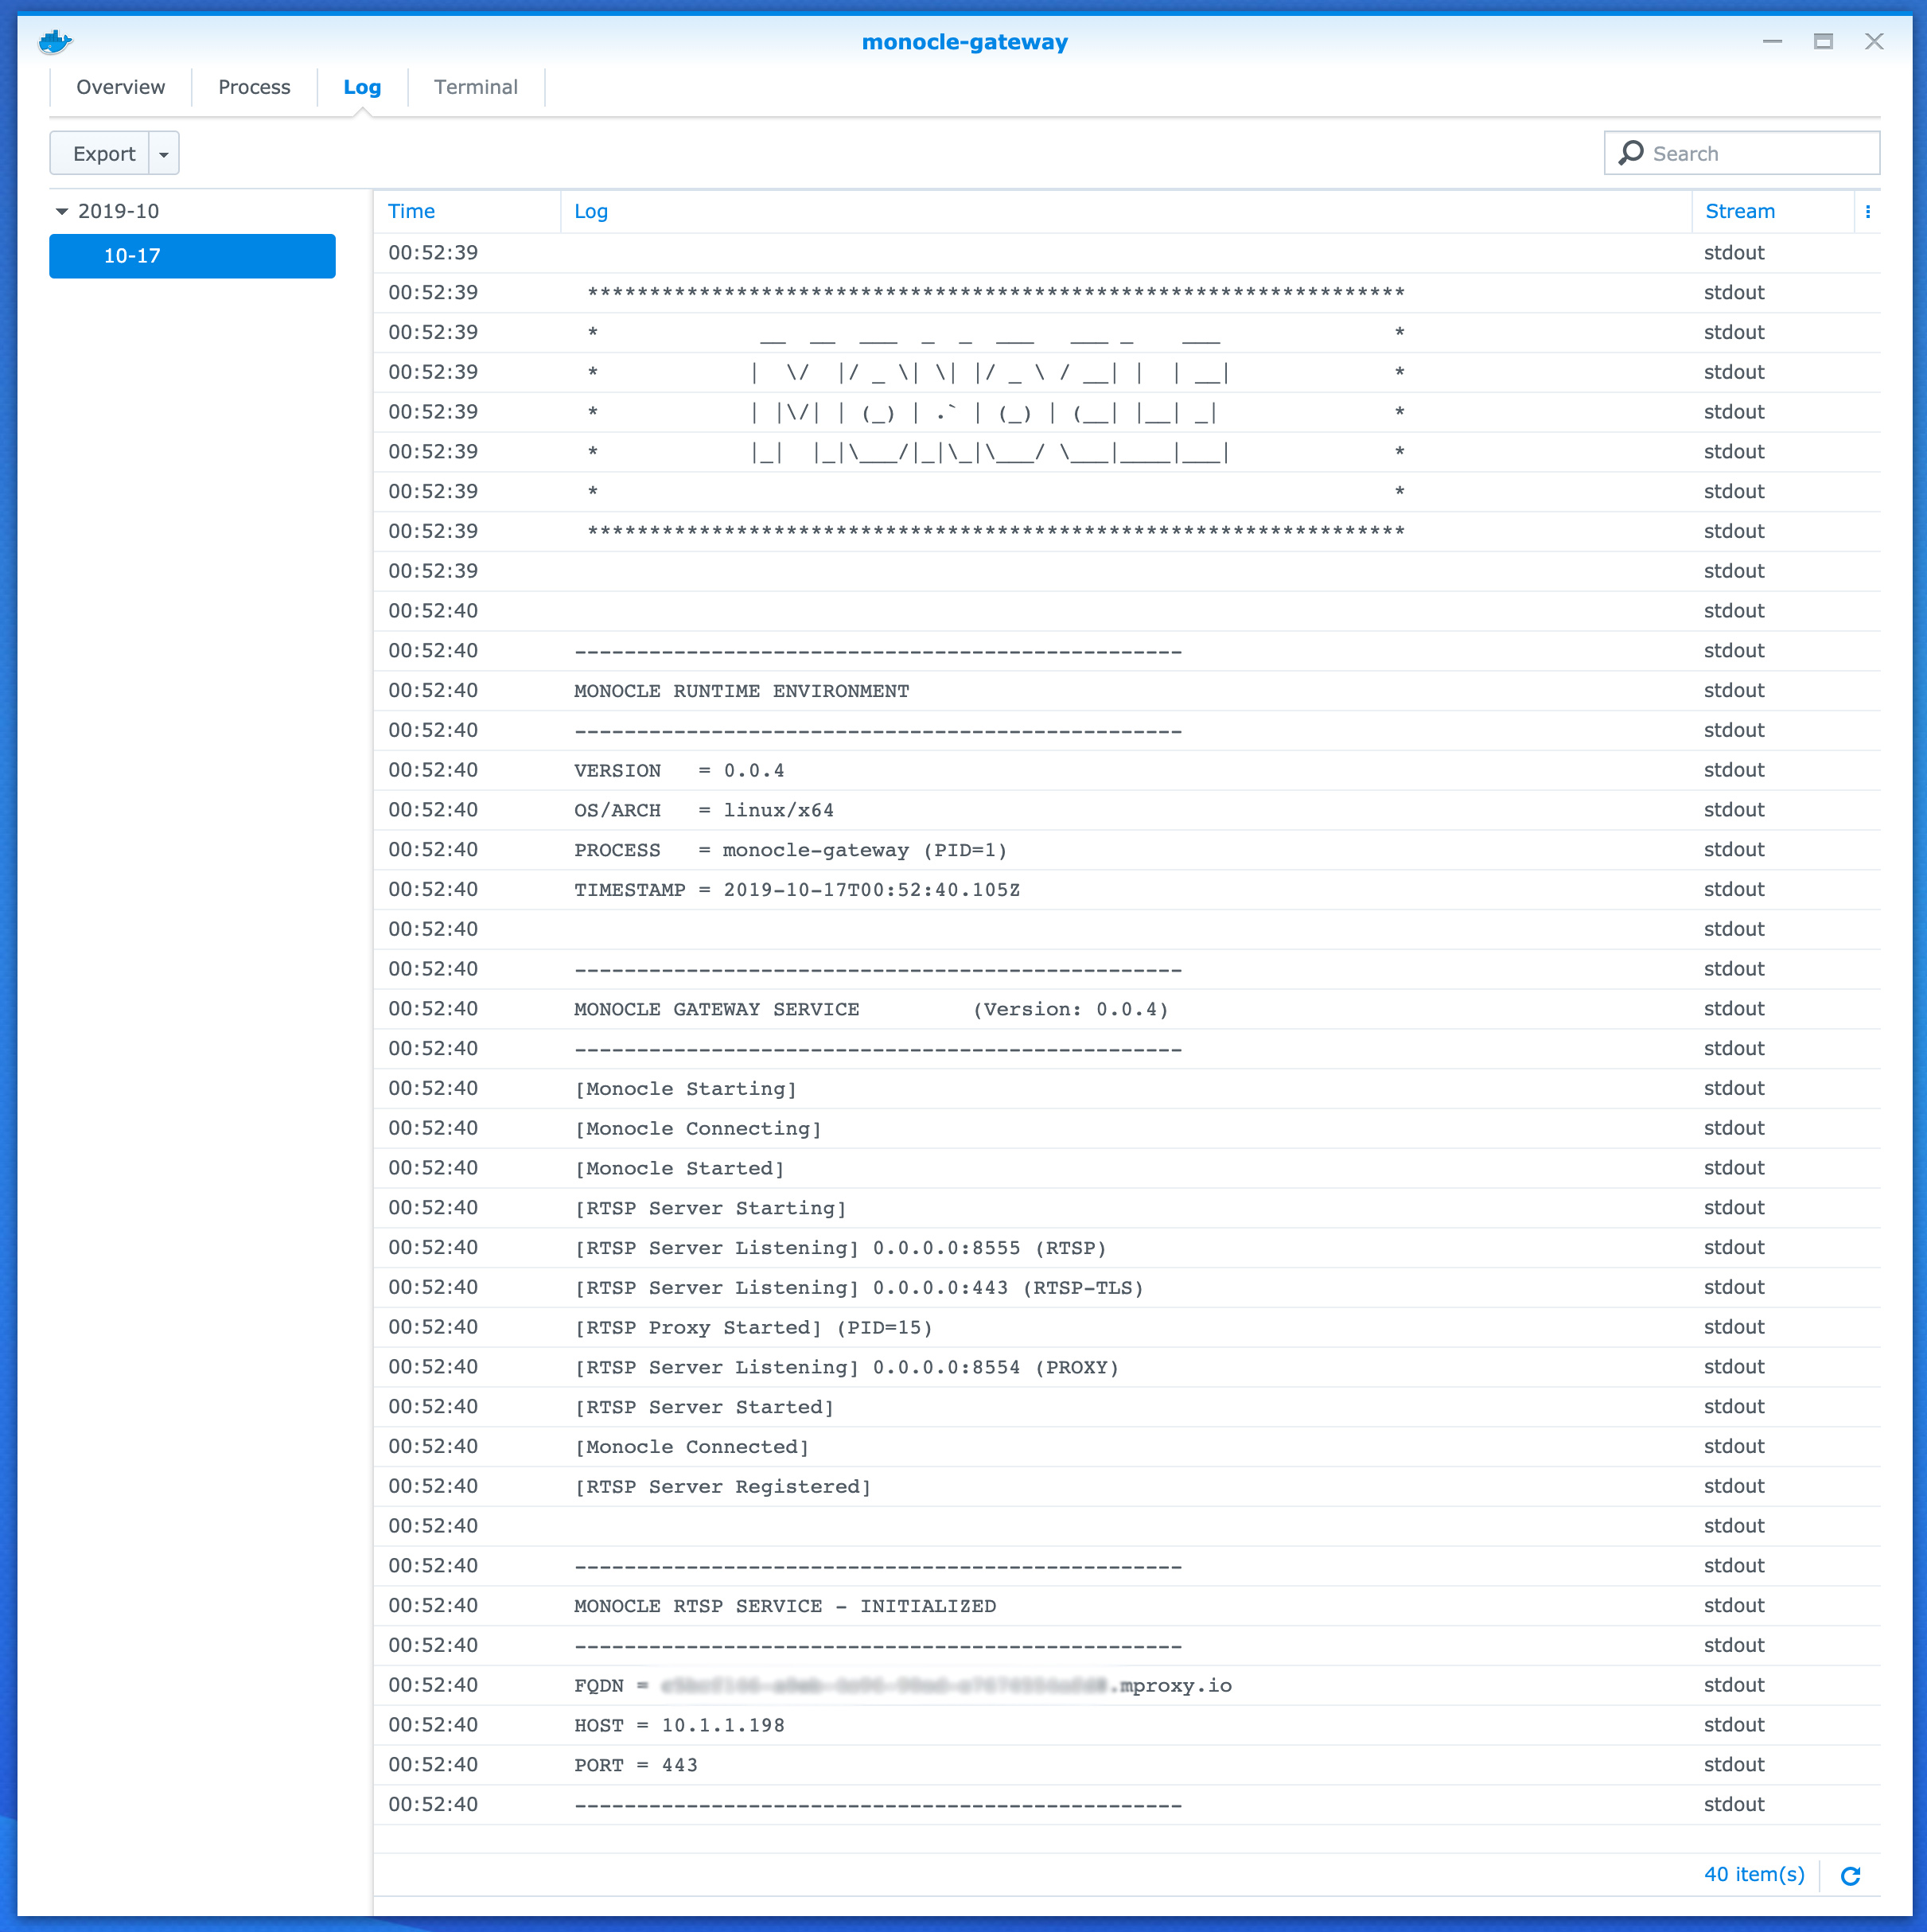
While viewing the monocle-gateway container Details, select the Log tab to see the logging output from the running Monocle Gateway instance. If the service started successfully and connected to your Monocle account using the downloaded monocle.token file, it should look like this:
The installation is complete and you are ready to start testing accessing your cameras from a supported Alexa device. Make sure not to forget to TAG cameras that should be routed to the Monocle Gateway.
Uninstall/Remove the Monocle Gateway Container
To remove the Monocle Gateway container, you can simply use the Docker (management) app in the Synology web admin GUI to stop the container instance, remove the container and remove the custom macvlan network.
Alternatively, you can use the existing docker-compose.yml script to automate the removal using the steps below.
-
Connect to a SSH terminal/shell session from your workstation to the Synology NAS using the "admin" account. The example below uses 10.1.1.3 as the IP address for the Synology NAS. You will need to use your Synology NAS IP address instead.
ssh [email protected] -
Once connected to a SSH shell session on the NAS, navigate to the monocle shared directory (on the volume where you created the monocle shared directory).
cd /volume1/monocle/The docker-compose.yml file should be located in this directory. You can use the ls command to list the directory contents and verify the docker-compose.yml file is found.
-
Now we will stop and remove the Monocle Gateway docker container instance and custom network using the following command:
sudo docker-compose down